Favicons are tiny, often overlooked but incredibly useful site icons that help establish a strong visual identity for your WordPress website at the very first glance. Precisely why every website needs a favicon.
It makes an excellent first impression on the user and also adds a professional touch to your website. The fact that your website instantly stands out from others is another plus.
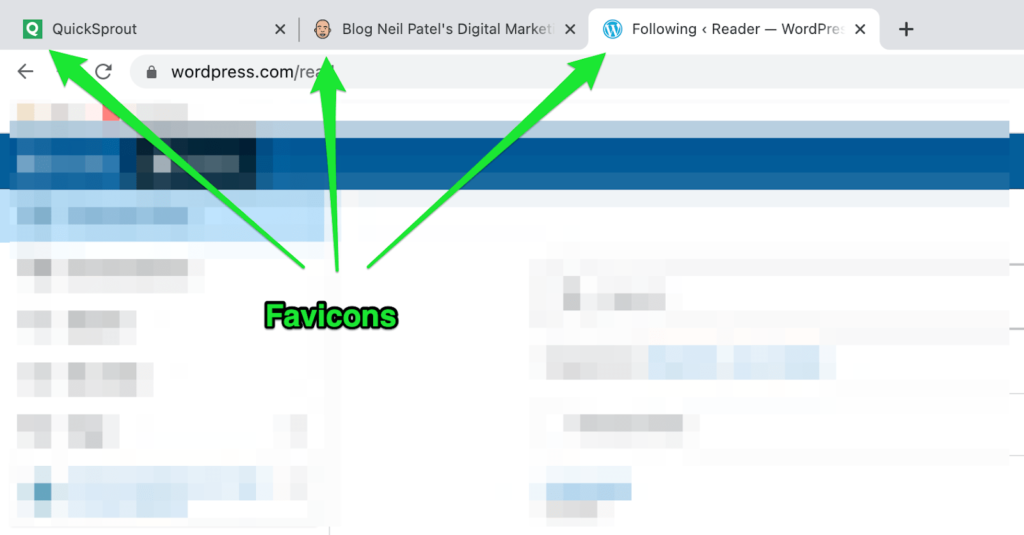
Think of Quicksprout’s green Q image, Neil Patel’s face icon, and the iconic W of WordPress, to name a few.
Now, when something can give you such great results and is super simple and straightforward to create, you should take full advantage of it. Don’t you agree?
In this guide, I’ll show you how you can create a favicon for your WordPress website, along with some advice to do it faster and more effectively.
Let’s get to work!
What to Expect When Adding a Favicon When to Your WordPress Website
Adding a favicon to your WordPress website is a super simple process. You have to create the favicon set first and then add it to your site using either the WP customizer, a plugin, or FTP.
Here’s how to go about it:
- Step 1 — Create a WordPress Favicon for Your Website
- Step 2 — Add the Favicon to Your WordPress Website
The Good
Brand identity and recognition is the ultimate goal for every website. And while there are multiple ways of doing this, such as selecting the right color scheme, choosing a great logo, and so on, a favicon can be substantial to further your efforts.
It can also improve user experience, allowing users to spot and differentiate between websites when they’ve opened multiple tabs on their computer. There are several other intangible benefits like improving a user’s mobile experience and quickly establishing trust.
It’s a win-win for you.
You can use your favicon as an app icon, too, which considering the current mobile phone era we live in, can be very beneficial. Many websites have already launched web apps or are in the process of doing so, so they can just use their logo as their favicon there, too. No extra effort is required!
Additionally, several plugins can simplify the whole process of adding the favicon to your website.
The Bad
You have to get the image dimensions correct when creating your favicon—plus, the image should be a square.
Many tools end up adding a transparent margin around the image to make it a square. Needless to say, the end result doesn’t look very professional, and neither does it make the same impact as an optimally-sized favicon. So a little caution is needed here.
If you plan on using the WordPress customizer to add your favicon to your WordPress website, make sure you have the latest version of WordPress.
The site icon feature to upload and crop a favicon image was only introduced after the launch of WordPress 4.3. As such, you‘ll have to upload your favicon to your website root directory through FTP if you have WordPress 4.2 or below, which is slightly more complicated than using a plugin or the customizer.
Furthermore, adding your favicon via FTP and pasting the HTML code directly into the <head> section of your theme puts you at risk of losing your favicon whenever you change your WordPress theme.
So you’ll have to do the whole process again.
Step 1 — Create a WordPress Favicon for Your Website
Before you can add a favicon to your WordPress website, you first need to actually have one.
If you already have a favicon ready to use, you can skip this and move on to the next step. Otherwise, I’ll show you how you can create a favicon that represents your brand.
Previously, website owners had to use a specific ICO file to create a favicon. Things have (thankfully) changed now.
Today, most web browsers support PNG, ICO, GIF, and JPEG files for favicons. However, you must remember that not all Internet Explorer versions support JPEG, so it would be better to opt for other browser options.
Photoshop proficiency can also be useful here. But even if you lack Photoshop skills, you can always use a basic cloud-based tool to create a favicon icon from a pre-existing image.

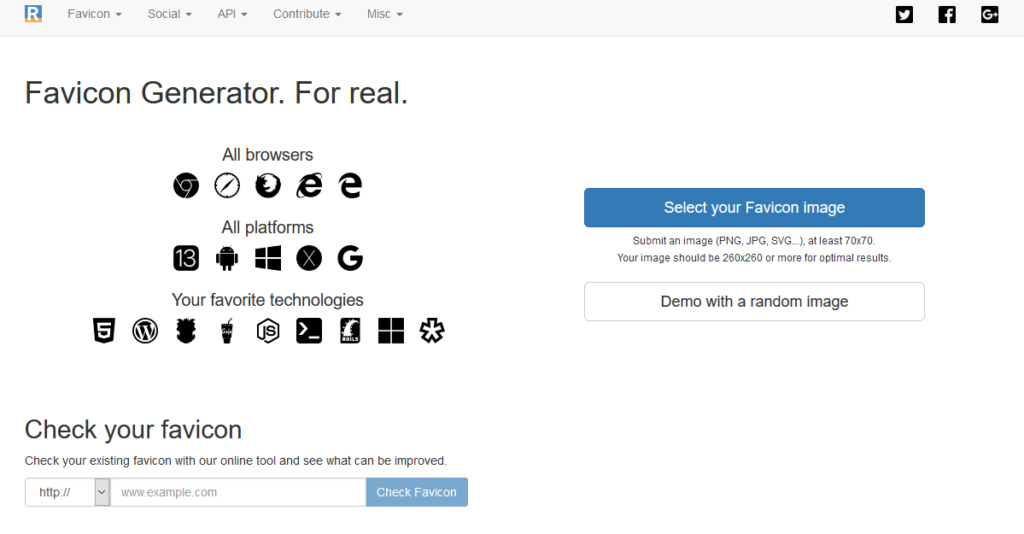
I highly recommend Favicon.cc, RealFaviconGenerator, and Favicon Generator, as they provide you favicon icons in both PNG and ICO formats, along with various customization facilities. All you need to do is paste the code that the plugin gives you, and you’ll be done.
Here are a few additional tips for creating a great WordPress favicon:
- Choose a favicon image that is 512×512 pixels.
- Your WordPress favicon should be a perfect square. If you use a rectangular image, you’ll have to crop it—either before or after uploading it to WordPress.
- You can add the favicon image via the WordPress customizer using the platform’s built-in cropping functionality.
- Your favicon display should typically be a 16x16px square. So try to choose an image that looks good once it’s shrunk down to those dimensions.
- Don’t forget to review Google’s recommended guidelines for creating and using favicons.
Below, I’ve compiled the steps for creating a favicon from scratch using RealFaviconGenerator.
Create and Install the Favicon
Open the RealFaviconGenerator website, and upload the image you want to use by clicking on the Select your Favicon image button.
On the next screen, you can configure specific details about your favicon set if you want.
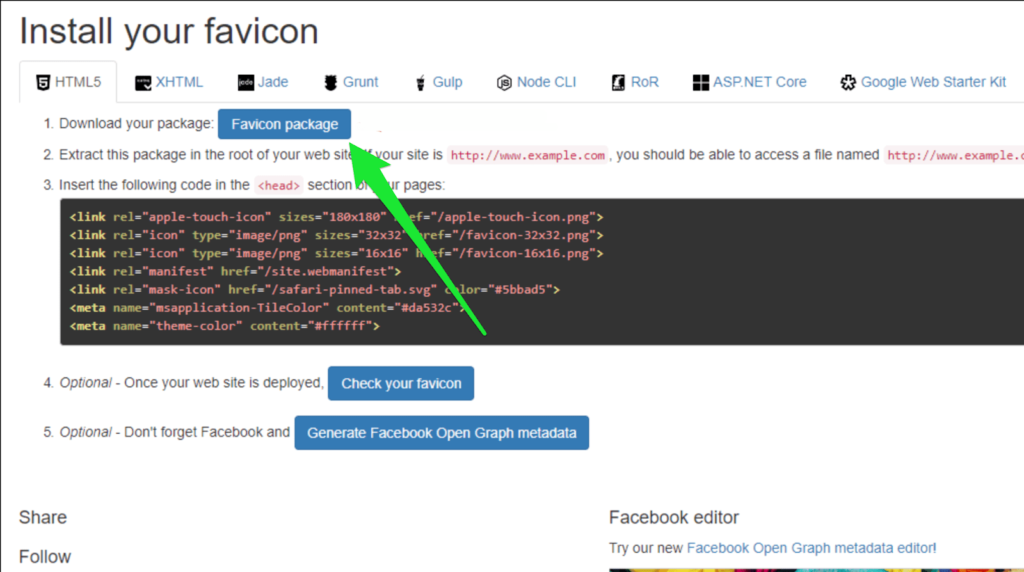
Once you’re finally done, scroll your cursor down, and click on Generate your Favicons and HTML code.
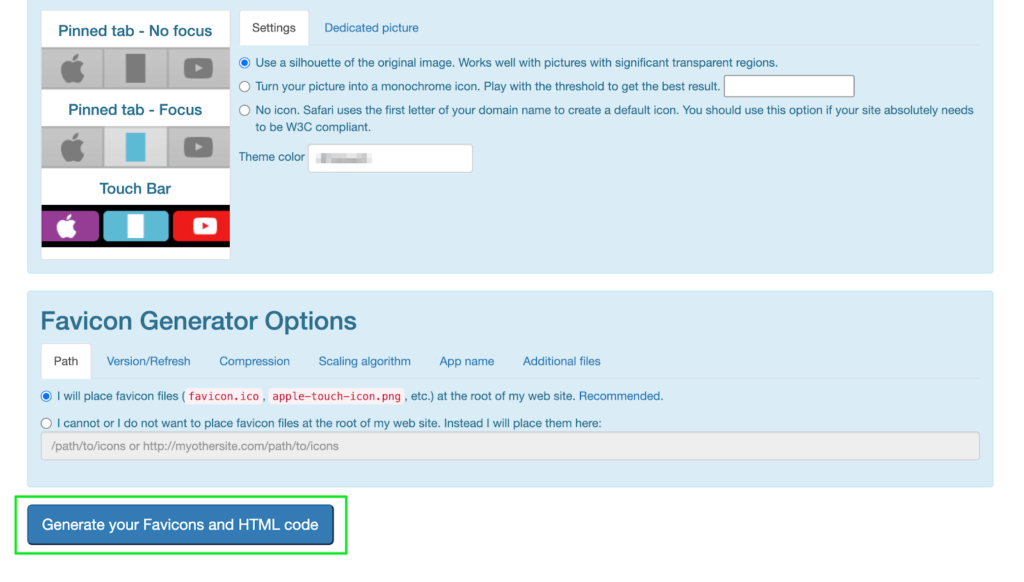
You’ll be directed to a new page. Over there, click on the Favicon package option to download your favicon images. If you prefer adding the favicon manually to your site, leave this page open.
Step 2 – Add the Favicon to Your WordPress Website
Next, you have to add the favicon to your WordPress website.
You can do this through one of three methods: Using the WordPress customizer, via a WordPress favicon, and through the FTP.
Each method is a great choice on its own, so it really boils down to your personal preference.
Method 1: Through the WordPress Customizer
Out of the three methods, this one is hands down the simplest and quickest.
Every WordPress website has a site icon feature after the launch of WordPress 4.3—something I’ve already mentioned above. As a result, it’s super convenient to upload and crop an image, which you can then use as a favicon for your site.
You need an image that’s at least 512×512 pixels, so keep that in mind. And that’s it! WordPress will take care of the remaining process.
Let’s take a look at how you can add your favicon to the WP customizer.
Go to Appearance from the main admin dashboard, and click on Customize from the dropdown menu.
From there, select the Site Identity tab. Then scroll to the bottom of your screen, and click on the Select site icon button under the Site Icon section.
![]()
At this stage, the WordPress Media Library interface will open on your screen.
You can either choose an existing image in your media library or upload a new one. Since we’ve already created our favicon using RealFaviconGenrator, you only have to upload the unzipped version of the favicon set to complete the process.
Once the upload is complete and you have the image ready, click on it and press the Select button. If the image isn’t a perfect square already, you can crop it directly on WordPress.
Once you’re happy with the image and how it looks, click on Save & Publish to make your favicon live.
Congratulations! Your favicon is live.
Method 2: Install a Plugin to Add Your WordPress Favicon
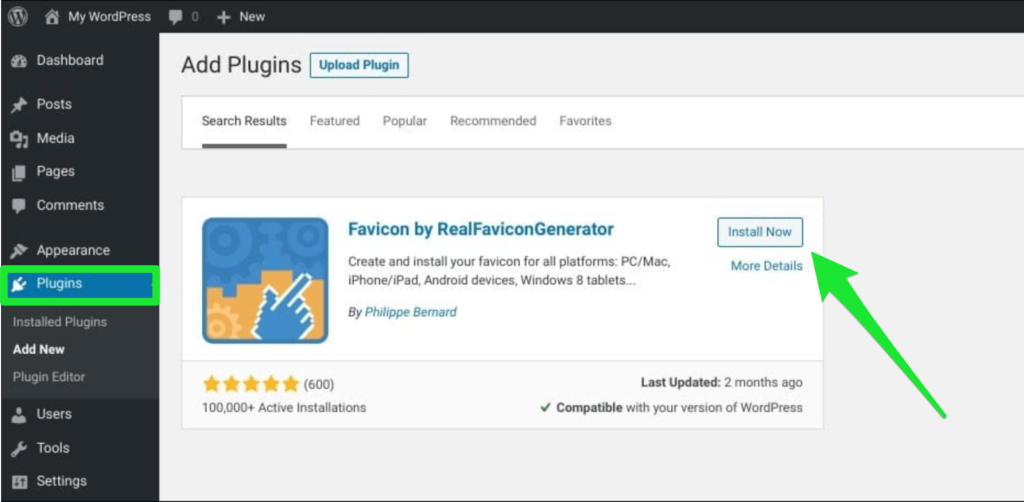
Many prefer plugins to the native WordPress site icon functionality. You can use the plugin called Favicon created by RealFaviconGenerator for this.
Just like the cloud-based tool, even its plugin is user-friendly. The latter does offer way more compatibility options for various devices and app icons, making it more preferable to using the WP customizer for most users.
Let’s look at how you can use the Favicon plugin—or any other variation—to add a favicon to your site.
Install and Activate the Favicon Plugin
Click on Plugins from the admin menu dashboard. From there, go to Add New.
Type in “Favicon” in the search bar located on the top right-hand side of your screen. Click on Search.
Hit the Install Now button to install the plugin on your website. This will start installing the plugin.
To activate the plugin, click on the Activate button that will replace the previous Install Now button once the installation process is complete.
Get Your WordPress Favicon
Once the Favicon plugin is installed and activated, you can then create the Favicon set.
Click on Appearance on the main WordPress dashboard, and select Favicon from the displayed options.
Select or upload the image that’s 70×70 pixels, and you’re done! Even a 260×260 pixels image would be good.
After this, click on Generate favicon.
You’ll then be directed outside your WordPress site to the RealFaviconGenerator website.
Scroll your cursor down until you see Generate your Favicons and HTML code (we did this in the previous section). When you select this button, RealFaviconGenerator will send you back to your WordPress dashboard.
At this point, your favicon is set up and ready to go live.
As you’re using a plugin, you can see a preview of how the end product looks on different devices in the plugin’s interface.
Method 3: Add your Favicon via File Transfer Protocol or FTP Manually
You can add a favicon to your WordPress site through File Transfer Protocol or FTP. You can also use the File Manager if your host uses cPanel.
As this method is manual, you have to be prepared to do everything by yourself. Since we‘ve already created the favicon image before, I’ll move on to the next step of this method.
Here’s what you need to do:
Open your site’s files either through an FTP client or the file manager in your hosting cPanel.
Find the WordPress root directory of your website, and upload your favicon package, along with its contents (it should typically be named favicons.zip).
Top Tip: The files will be in the same folder as your wp-admin and wp-content folders.
Remember the HTML code we got when creating the favicon on RealFaviconGenerator? You’ll need that now.
You can either add the code to your theme’s header via a plugin like Insert Headers and Footers, or you can paste it directly into the <head> section of your theme by editing your theme’s header.php file.
I recommend using the Insert Headers and Footers plugin, as you won’t have to redo the whole process of adding your favicon if you decide to change your WordPress theme down the line.
Here’s how you can install and activate the Insert Headers and Footers plugin:
Go to Settings on your main WordPress dashboard, and click on Insert Headers and Footers. Paste the HTML code into the Scripts in Header section.
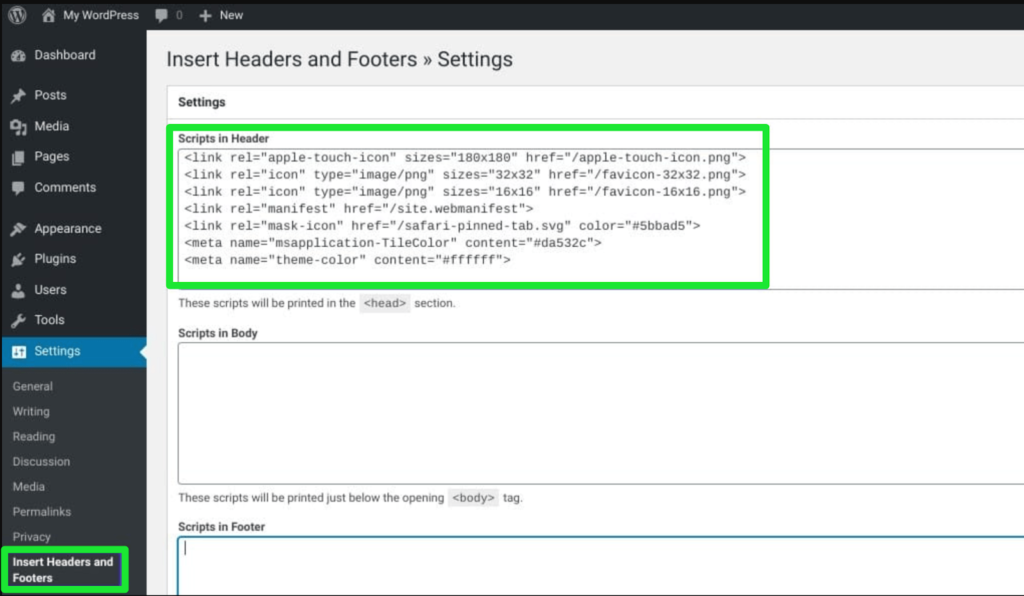
Save all the changes made. Your WordPress favicon is all set and ready to go live!
via https://AiUpNow.com May 15, 2021 at 12:05PM by Lars Lofgren, Khareem Sudlow,
