The beauty of the best VPN services is that they have an intuitive Windows 10 app that makes setting up a connection as easy as clicking a big green button that says "connect." However, if you're running Windows 10 in S mode and can't install apps from outside the Store, or you're using a VPN without a client, you can still configure a VPN manually. This is especially important as many people continue working from home and require a VPN. Here's everything you need to know.
What you need to get the job done
- Premier VPN service: ExpressVPN (From $6.67 monthly at ExpressVPN)
- Microsoft's latest OS: Windows 10 (From $139 at Microsoft)
How to manually add and connect to a VPN on Windows 10

Once you subscribe to a VPN service — keep in mind there are plenty of great VPN options out there — you should have access to a list of servers that you can connect to. It will differ depending on the VPN service you're using, but you should have access to a webpage or desktop app section that lists the server's location, the address needed to create a manual connection, and the current load of the server.
Your VPN provider should also provide manual sign-in information that can be used as credentials. This might be some sort of username and password or certificate depending on the service.
Once you have the required information to make a connection, you can jump into settings and get everything running.
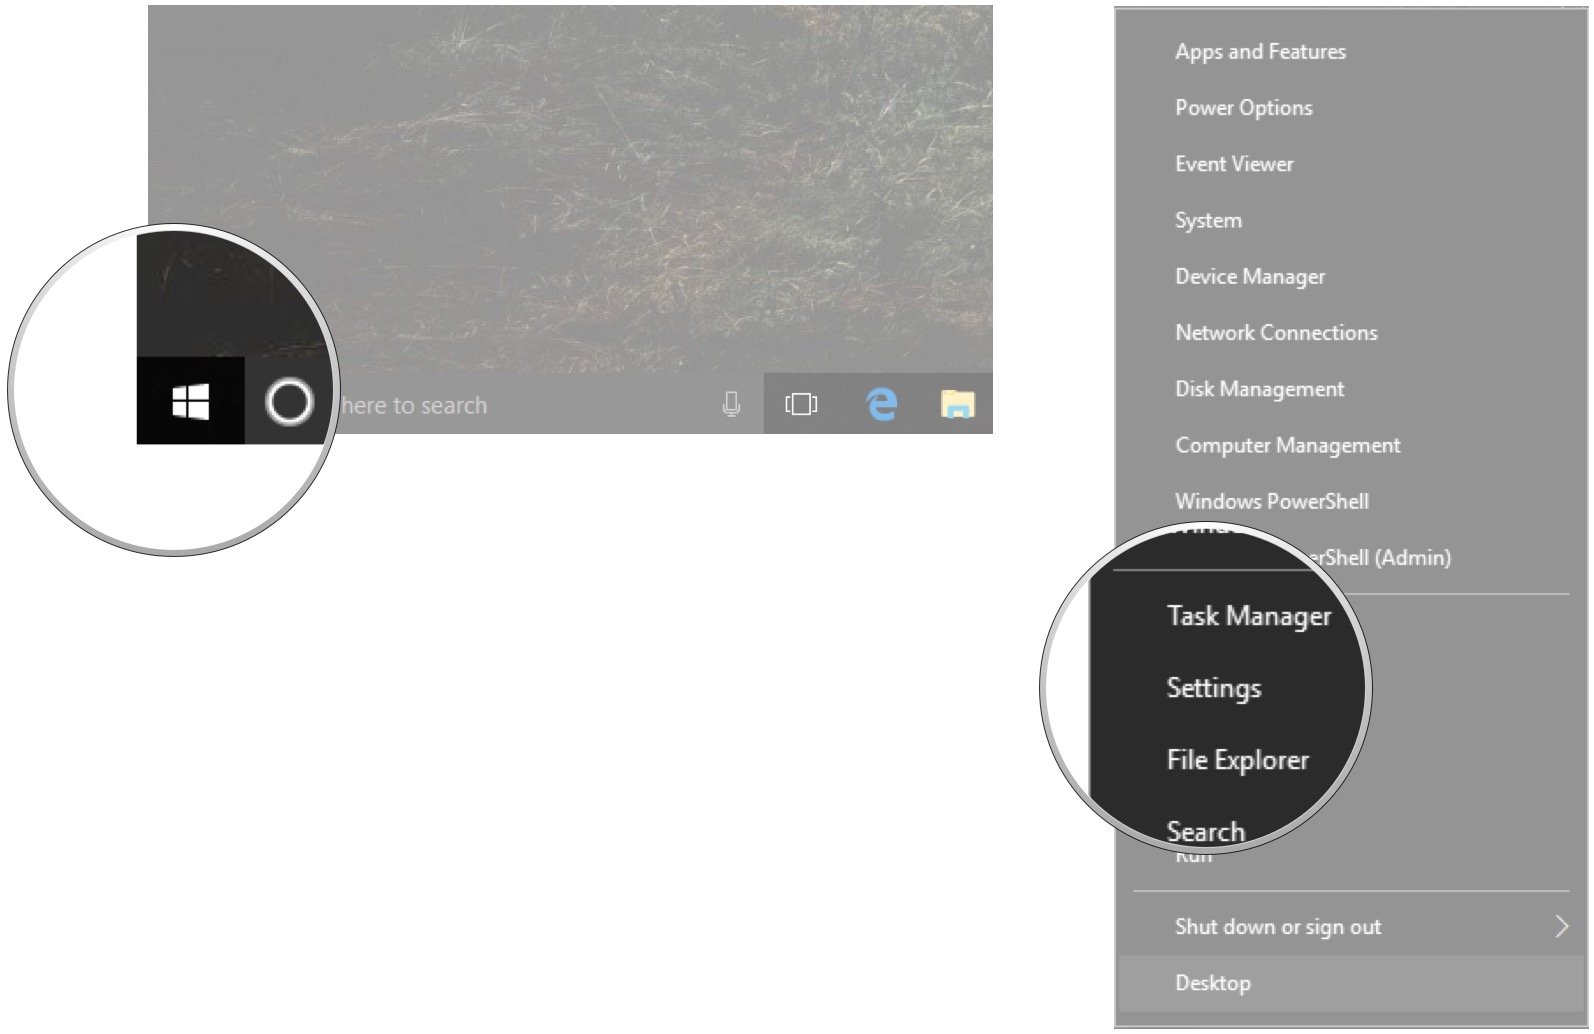
- Right-click the Start button.
-
Click Settings.
- Click Network & Internet.
-
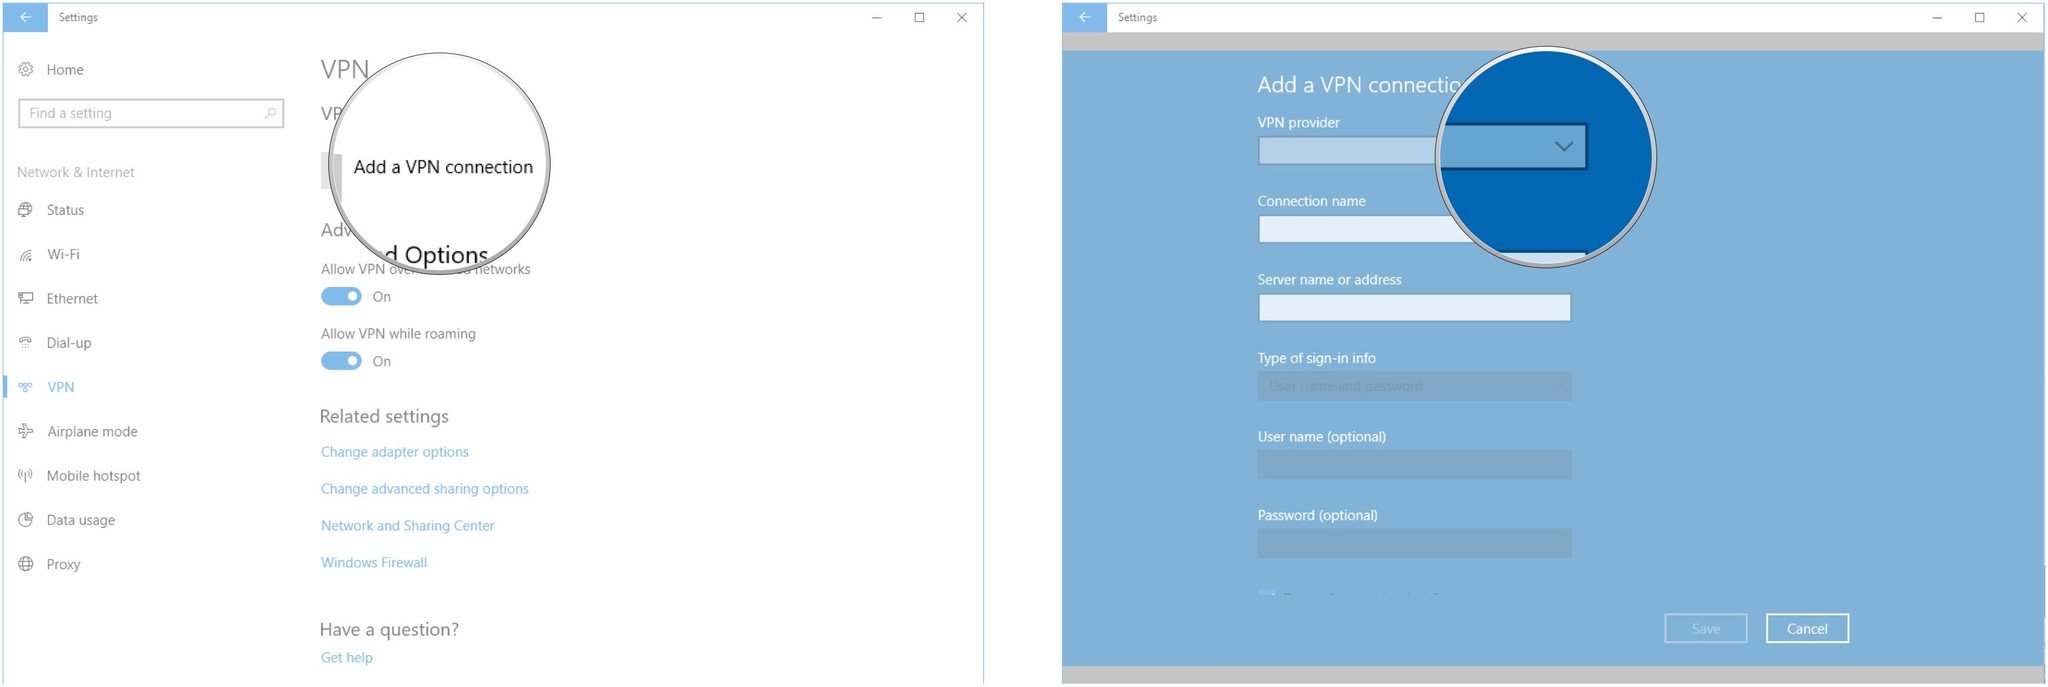
Click VPN.

- Click Add a VPN connection.
-
Click the dropdown menu below VPN provider.
- Click Windows (built-in).
-
Click the Connection name field.
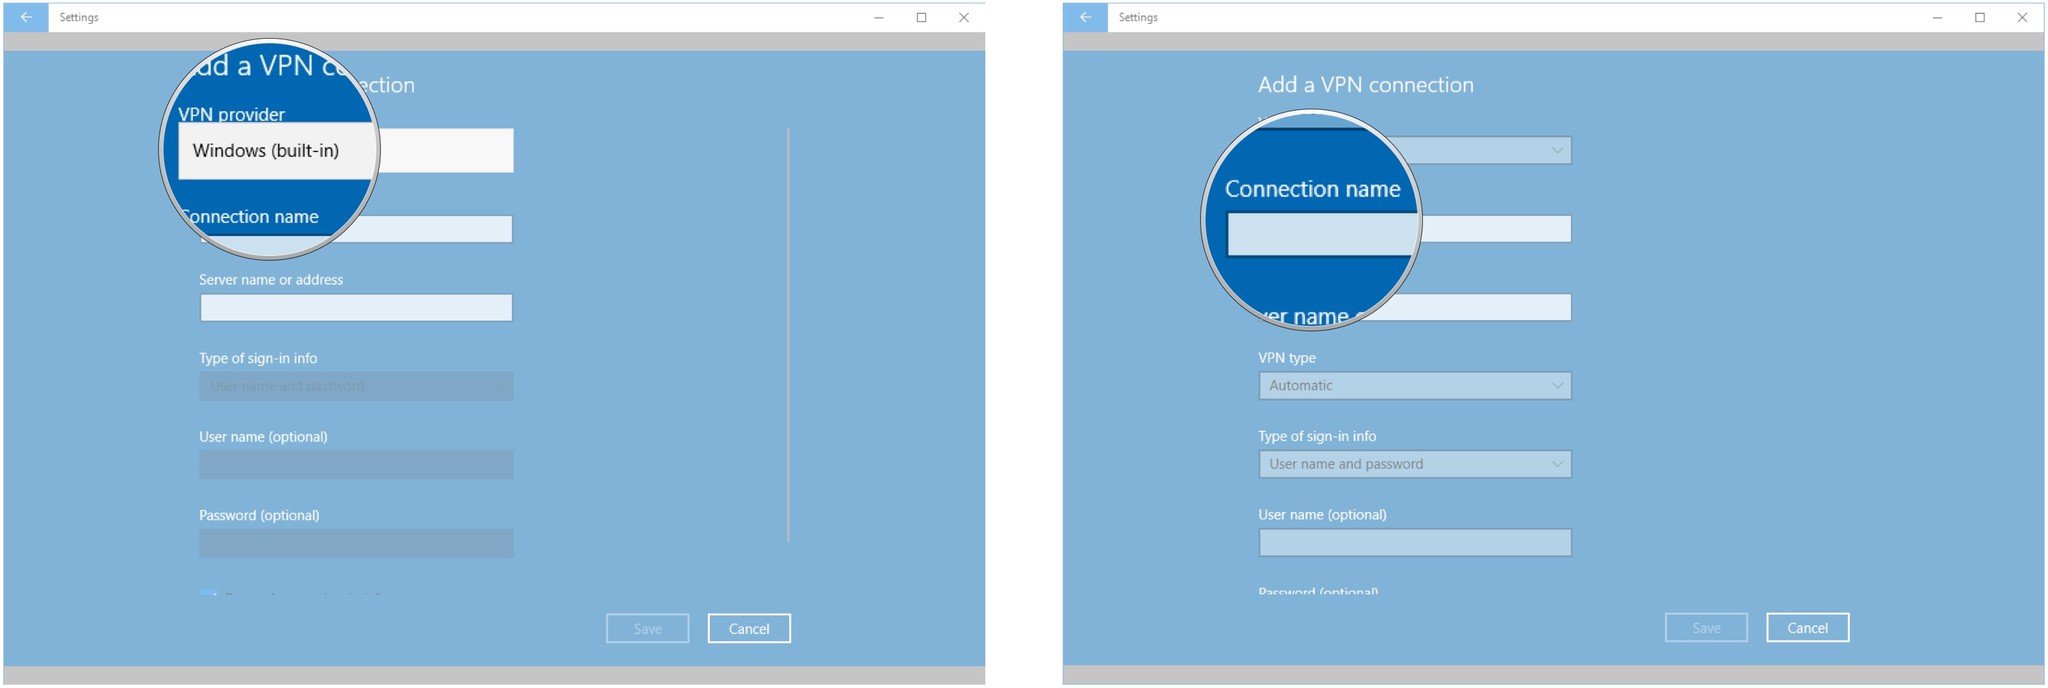
- Type a name for the VPN connection. (In this case, I'll use the name of my provider and the server location.)
-
Click the Server name or address field.
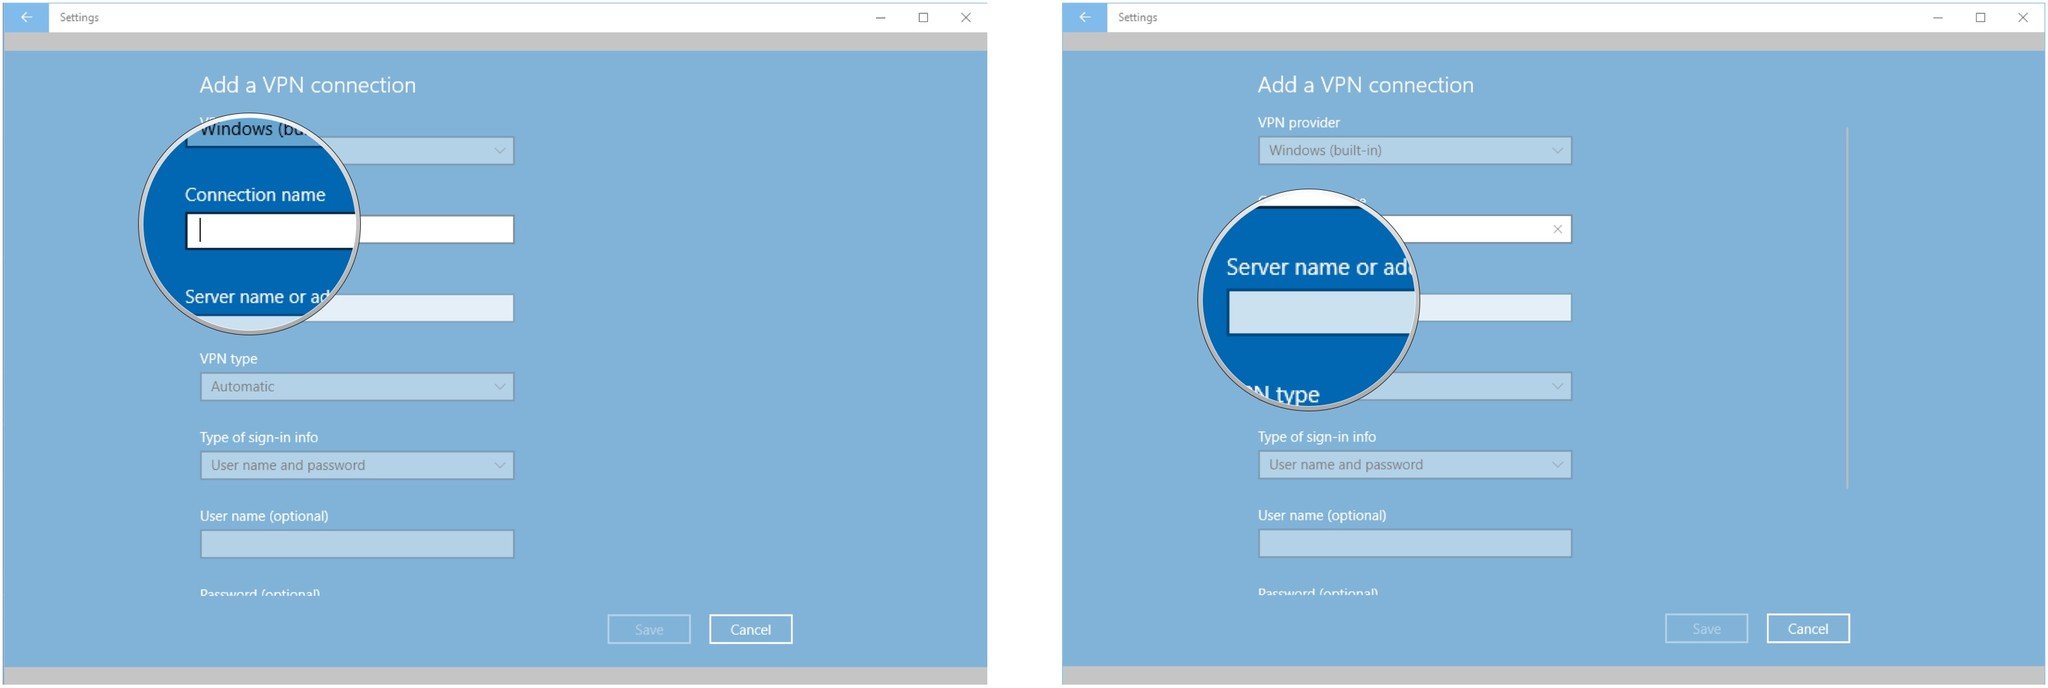
- Type the server's address. (You can likely find this in your VPN account.)
-
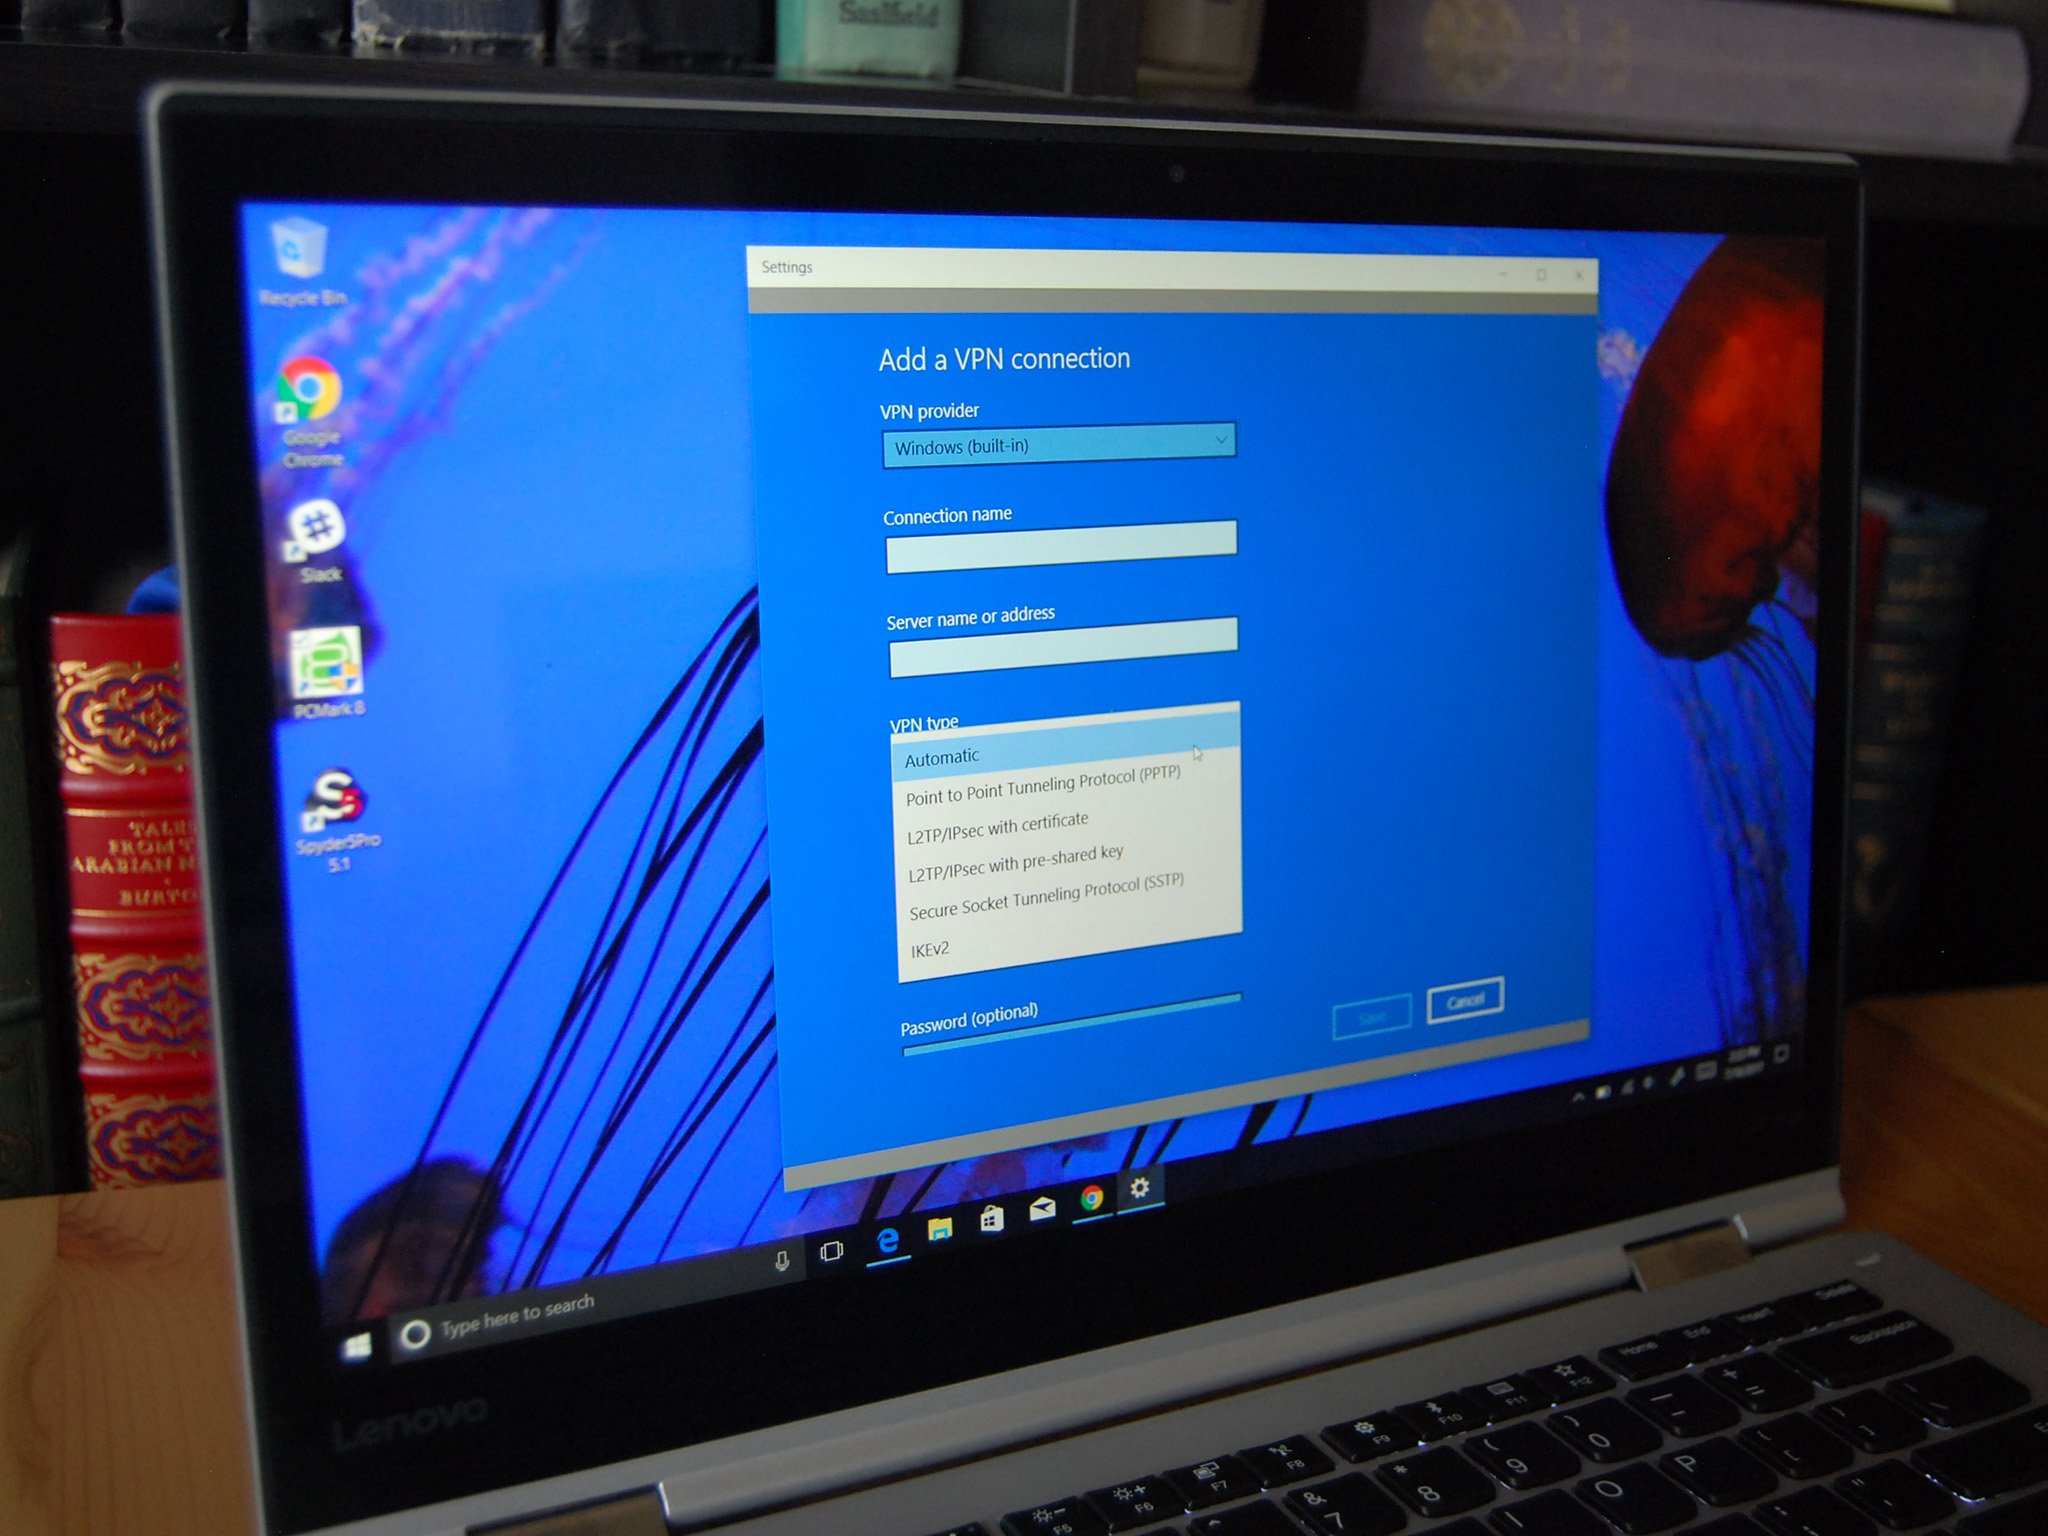
Click the dropdown menu below VPN type.
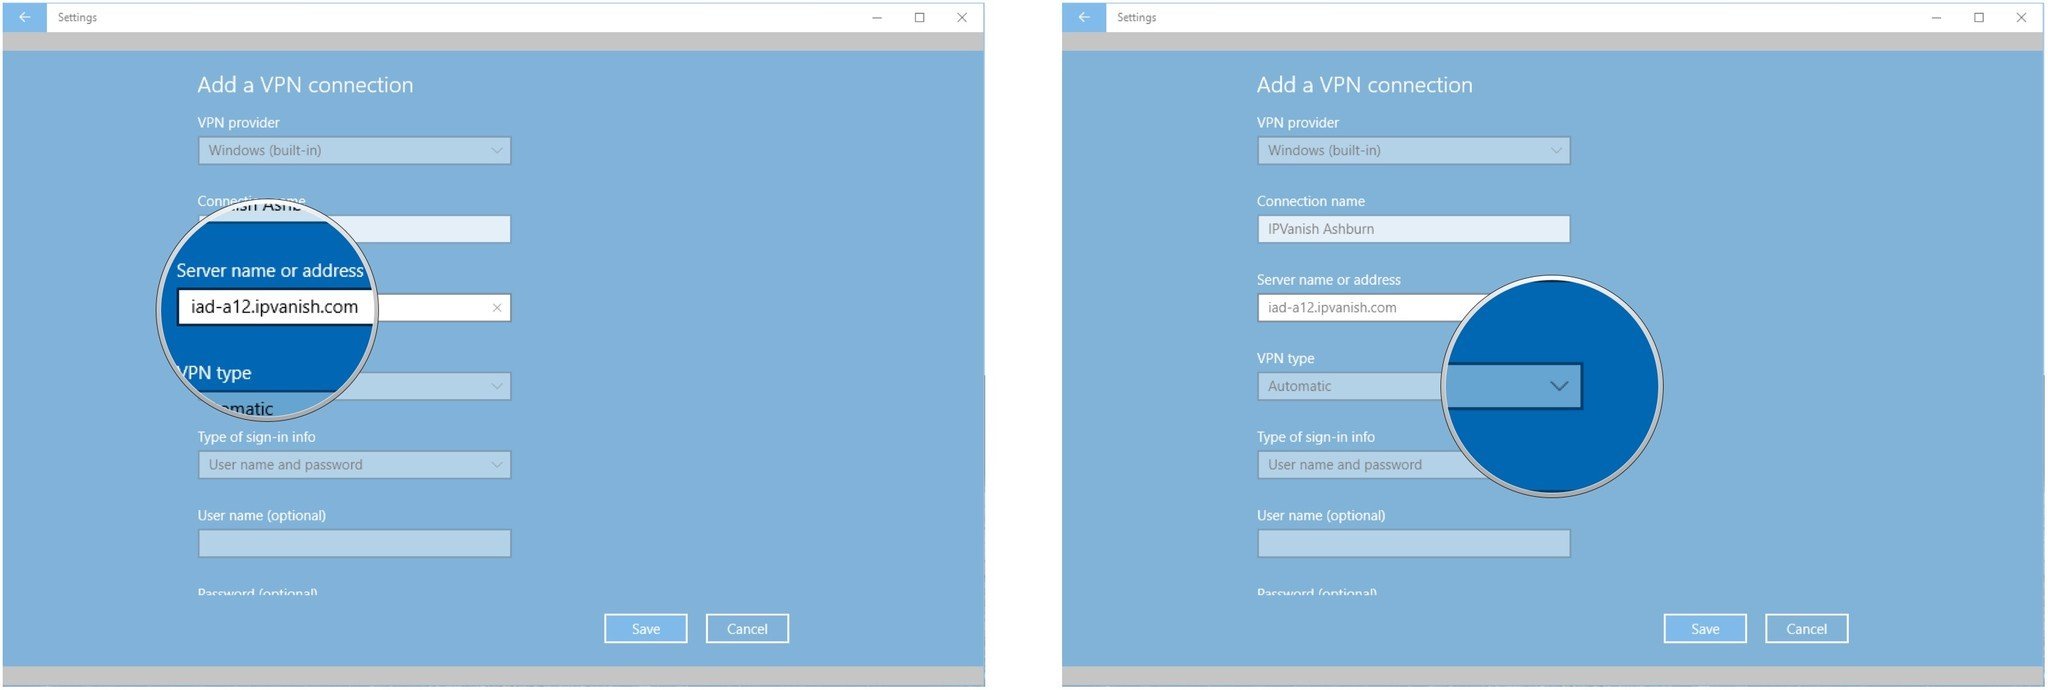
- Choose a connection protocol.
-
Click the dropdown menu below Type of sign-in info.
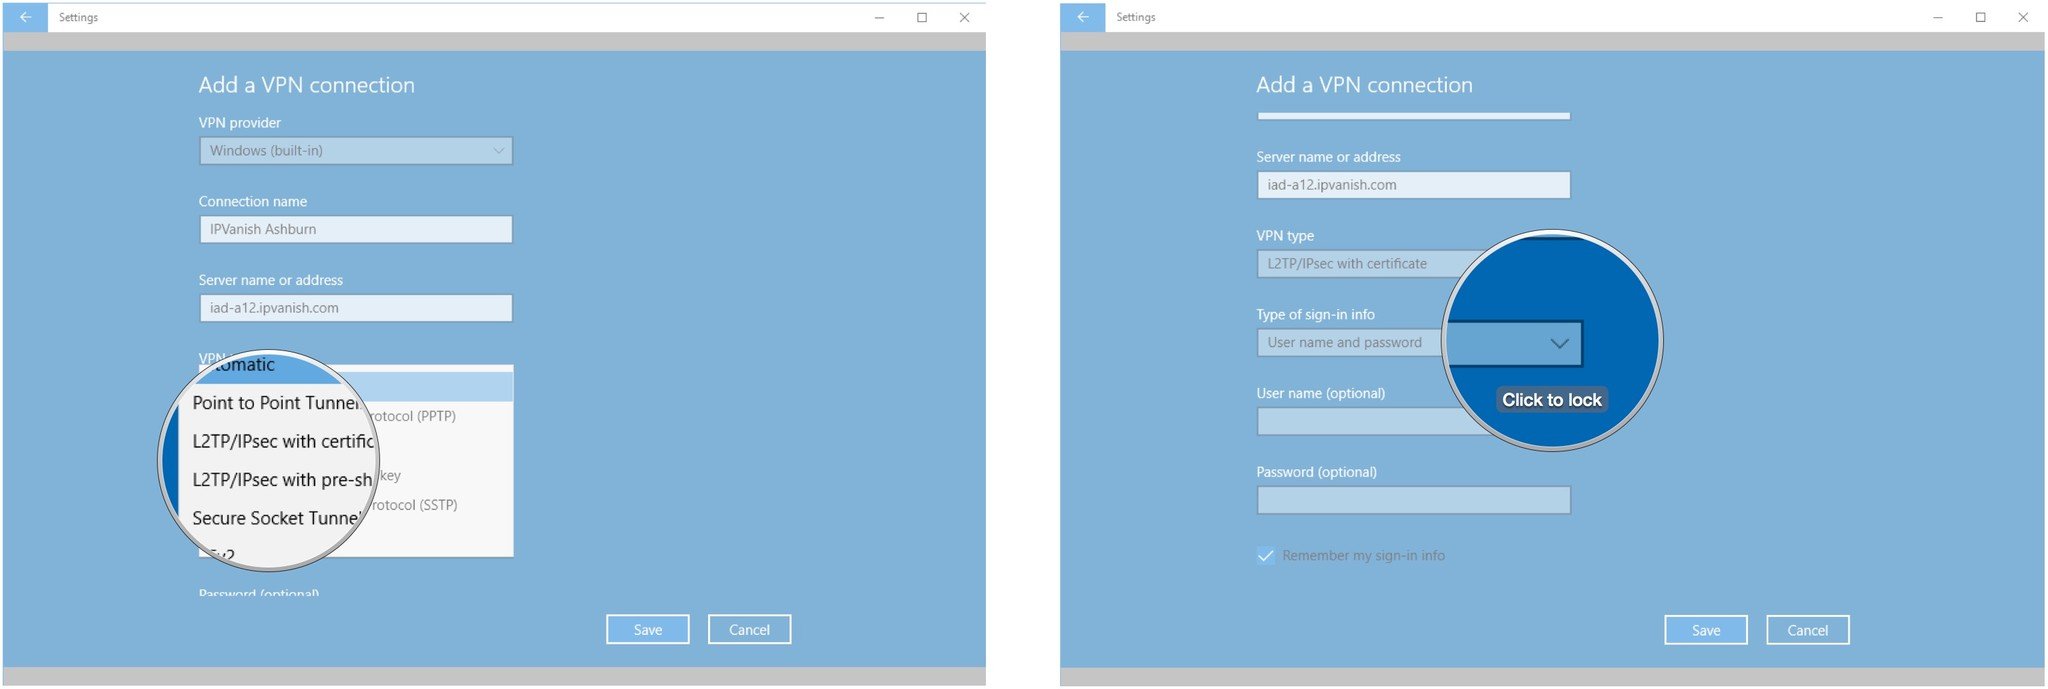
- Click a sign-in method. (This will no doubt change depending on your VPN provider.)
-
Click Save.
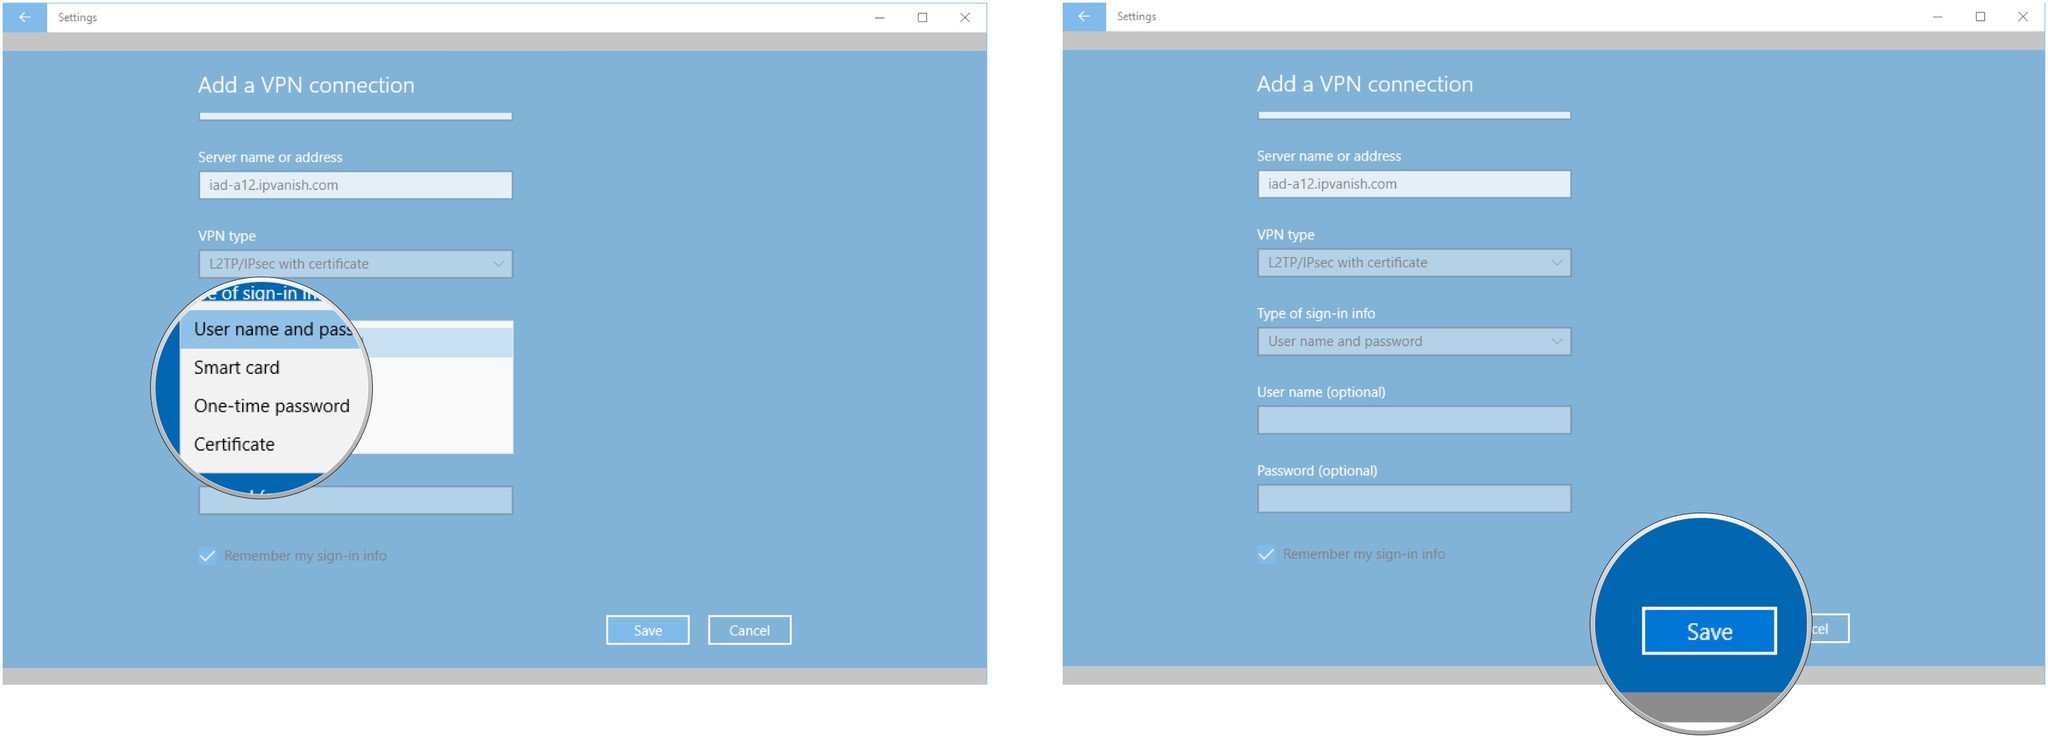
- Click the VPN you just set up. (It will now appear in the VPN list.)
-
Click Connect. (Depending on the sign-in method used by your provider, you might have to enter your username and password.)

How to disconnect and remove a VPN on Windows 10
If you don't want to use a VPN anymore, or if you just want to remove a server from the list, you can disconnect or altogether remove it. There is a VPN button for quick on and off located in the Windows 10 action center (the small speech bubble in the bottom-right corner of your display), but we'll go through the entire process, which includes completely removing a VPN from your system.
- Right-click the Start button.
-
Click Settings.
- Click Network & Internet.
-
Click VPN.
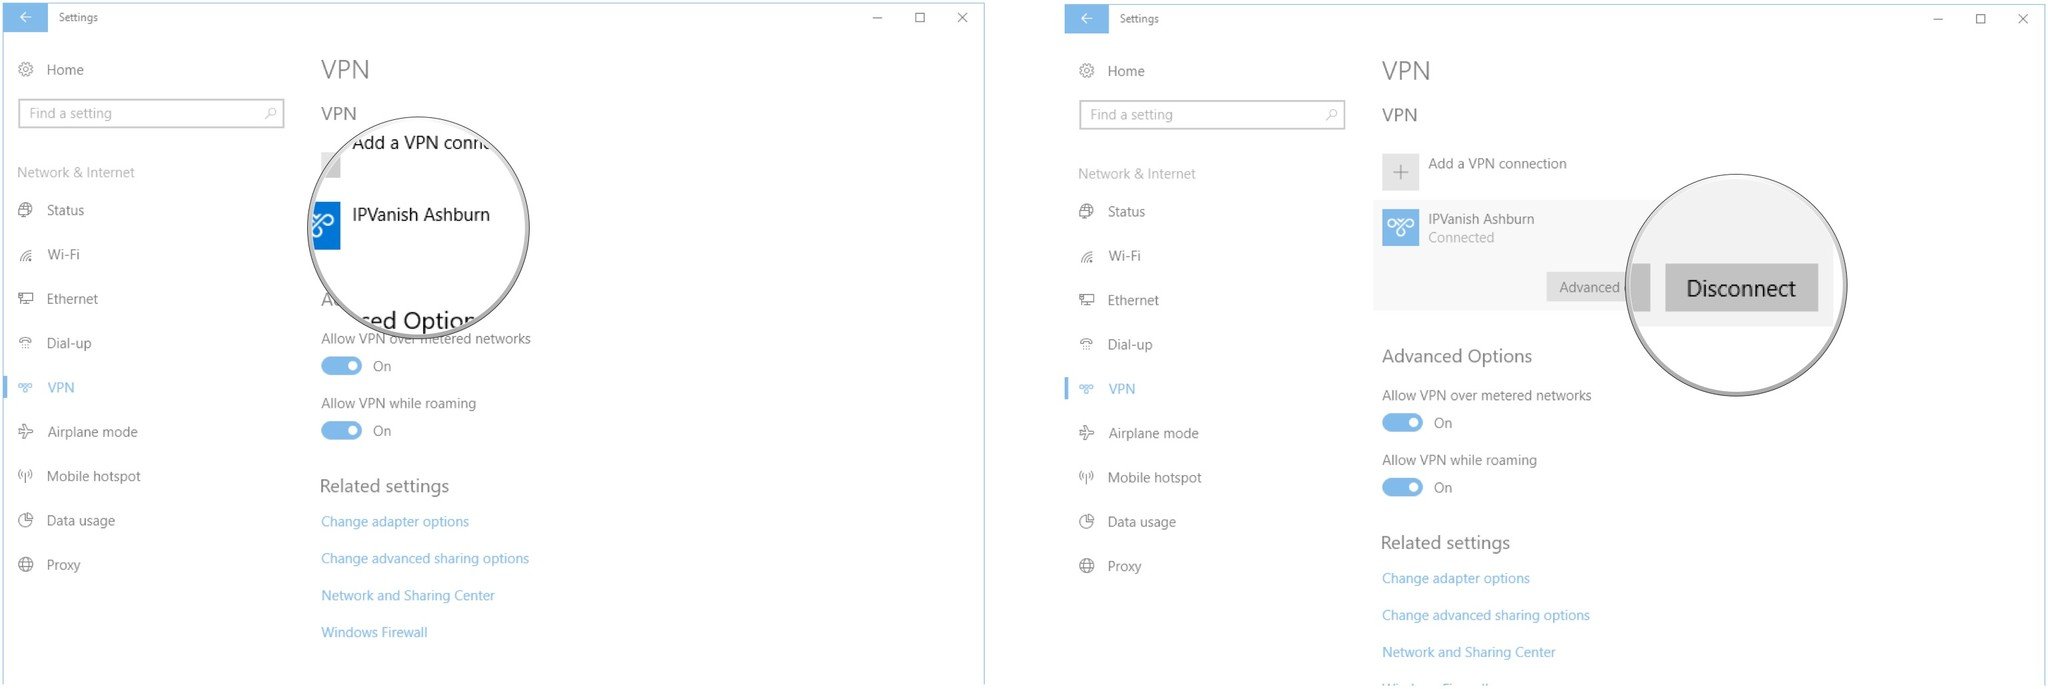
- Click a VPN connection you want to disconnect or remove.
-
Click Disconnect.
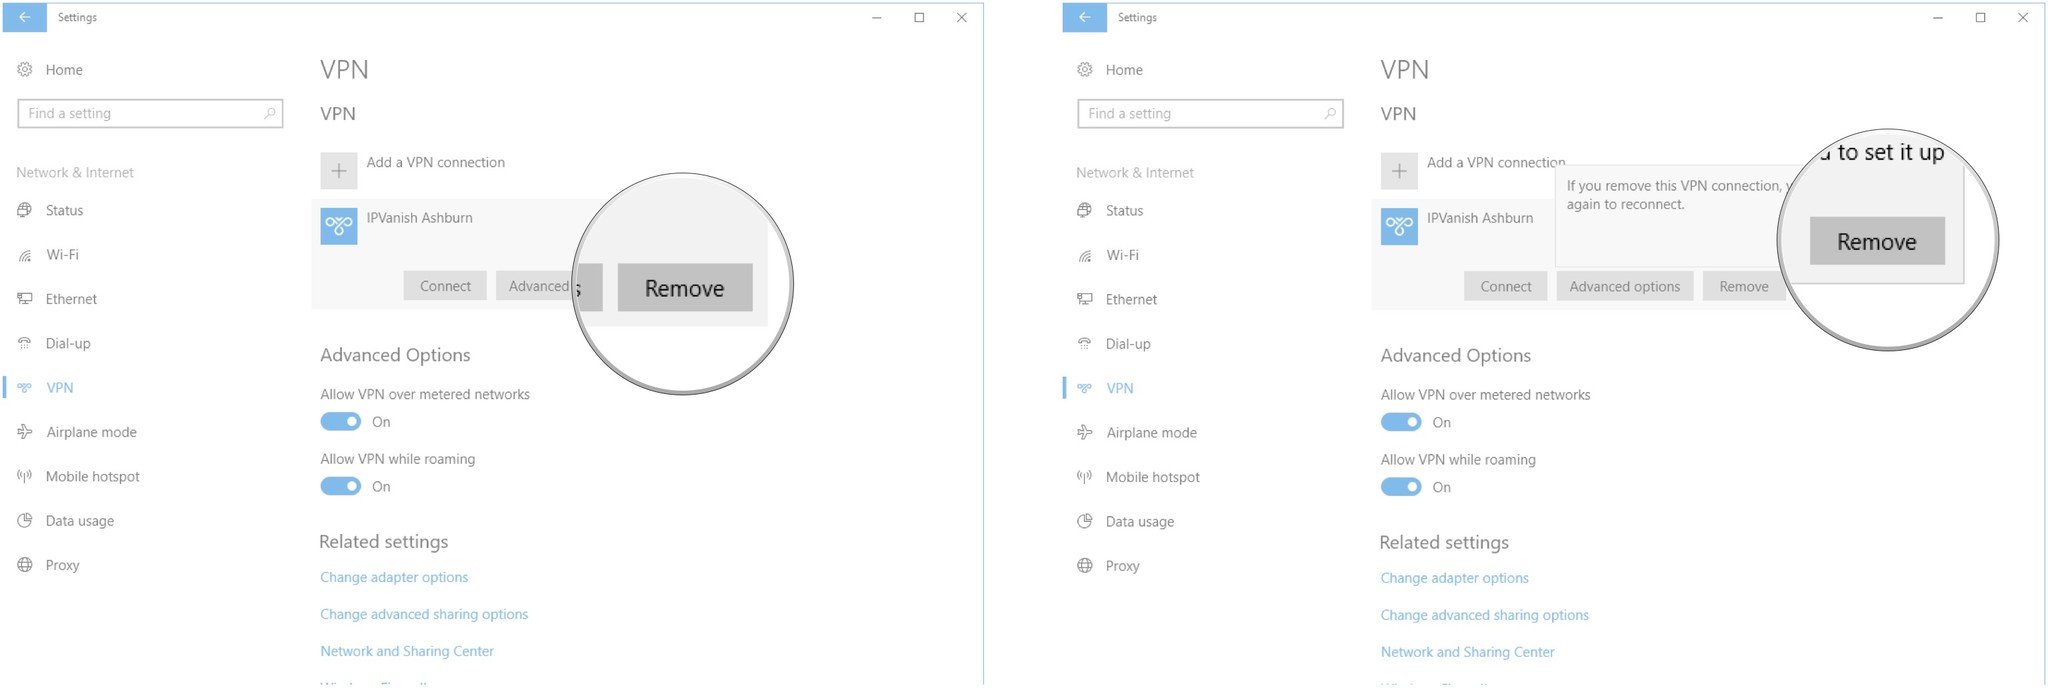
- Click Remove.
-
Click Remove again to confirm.
Our top VPN and software picks
To complete the steps laid out above, you'll need to invest in a quality VPN, and you'll need Windows 10.
Premier VPN service
ExpressVPN
![]()
From $6.67 monthly at ExpressVPN
With rock-solid encryption and plenty of connection protocols for you to use, including OpenVPN, this is one of the best services operating today.
Microsoft's latest OS
Windows 10 Home
Get the latest Windows from Microsoft
Windows 10 is the latest and greatest OS from Microsoft, bringing ever-improving features and security to your PC. If you're not already using Windows 10, it might be time to discover what you're missing.
More great VPN services
Are you not buying what ExpressVPN is selling? Check out these other excellent VPN services we recommend. You can also have a look at our roundup of the current best VPN deals if you're looking to save some money.
Surfshark VPN
![]()
See the latest pricing at Surfshark
Surfshark puts no limit on how many devices can connect, making it a great VPN option for the whole family.
CyberGhost VPN
![]()
See the latest pricing at CyberGhost
Tons of servers, rock-solid security, and affordable long-term plans make CyberGhost an excellent option for a lot of people.
Private Internet Access

When it comes to a VPN and its apps, some people want a UI that has only what is needed. Private Internet Access is exactly this.
IPVanish
![]()
See the latest pricing at IPVanish
IPVanish is one of the easiest VPNs to use, thanks to an app with a user interface that appeals to both novices and experts alike.
via https://AiUpNow.com March 27, 2021 at 06:02AM by Cale Hunt, Khareem Sudlow,
